After the success of my kindle cover workshop, I have been busily making some more kindle covers to put onto my folksy site

I also wanted to share with you my first ever tutorial!
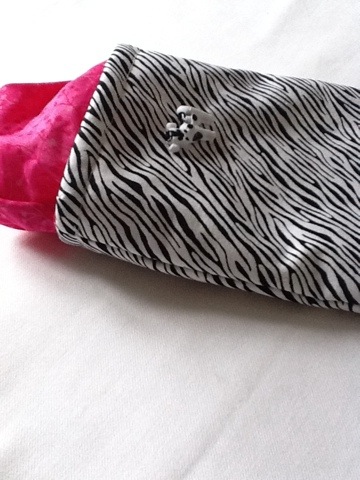
So here we are, how to make a simple button closure kindle cover! It will fit the bigger sized kindle with the keyboard. It should take approx 1 hour to make and some sewing experience would be beneficial.
You will need the following:
Sewing machine
Fabric (one fat quarter will make the kindle cover, however you would need more if you want a different coloured inner to the outer)
Wadding (medium/light weight, can use fusible) For the tutorial I have used non fusible.
Thread
Scissors/rotary cutter and cutting mat
Needle for hand sewing
Button and ribbon/ric rac
Iron and ironing board
Pins
Throughout the tutorial, use the edge of the foot as a guide for seam allowance (approx 3/8″)
1) If using 2 different colours for outer and inner fabric, decide which will be the inner and which will be outer. Cut fabric into four pieces 6.5 x 9 inches, cut the wadding to the same size.
2) Place each piece of wadding next to wrong side of fabric, then place right sides of fabric together. Pin the pile of wadding and fabric together (both wadding pieces should be on the outside, sandwiching the fabric which is right sides together)

Sew down the long sides and bottom, trim corners, turn ride sides out and poke corners.
3) Place right sides of inner together, pin and sew down long sides.

4) Place inner ‘tube’ over outer so that right sides are together. Fold approx 5″ of ribbon in half and place in the middle of the inner and outer fabric – half way across the top. Make sure the raw edges of the ribbon are poking out of the top. Pin all in place, making sure side seams of outer and inner are aligned.

5) Sew around top of fabric

Turn right sides out

Push inner into outer and press.
6) Top stitch around top of cover, ensure ribbon is out of the way.

7) Pull inner out. Decide on position of button, ensuring ribbon will reach and sew on (ribbon will flap over top of cover, therefore button goes on opposite side to the one ribbon is on)
8) Fold in open edge of inner using iron to press, then sew close to edge

9) Push inner into outer, press.
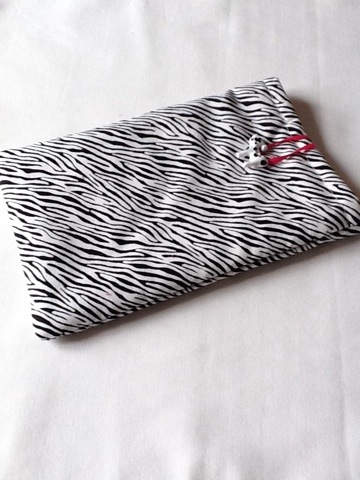
Tadaa! Hope you have enjoyed my first tutorial and like my choice of fabric and button – animal fabric and cow button both from Buttons boutique. Both covers will be available to buy in my Folksy site
To make an iPad cover, you will need to cut the fabric and wadding to 11.5 x 9″ and follow the same instructions.
Please pop over to Wendy’s blog to join in this weeks handmade Monday.
Sarah x


I kind of followed that!! Love the little button sooo cute! 🙂
You’d be fine for making one 🙂
Lovely fabrics, excellent tutorial. Glad the workshop was a success – here’s to many more!
What a lovely, unusual fabric. Thanks for taking the trouble to post a tutorial.
Love the fabrics, I always see these first rather than the item sorry, how my brain works. Good work on the tutorial
Great tutorial and so easy to follow. And a really great result too! Am looking forward to lots more 🙂
A great tutorial – glad the Kindle cover workshop went well and many thanks for sharing your tutorial. Hope you have a great week.
Well done – great idea & very useful.
that’s a great tutorial, thanks for that. something I will definitely have a go at!
I love the bicycle fabric and you make this look very easy
Brilliant tutorial. I need a cover for my kindle but I can’t sew for toffee so i’ll be passing this on to someone to make it for me! x
perfectly timed for me, I have my design planned but I didn’t know the sizes! Good clear pics too.
great tute! adding it to my favourites
thanks for sharing 🙂
the bike patterened fabric is so nice!
Great fabric and I love the button, I love fabric covers.
A great tutorial, thank you.
Jan x
Pingback: DS Cover Tutorial « Tilly Mint Boutique
Pingback: Crafty stuff | The Gingerbread